
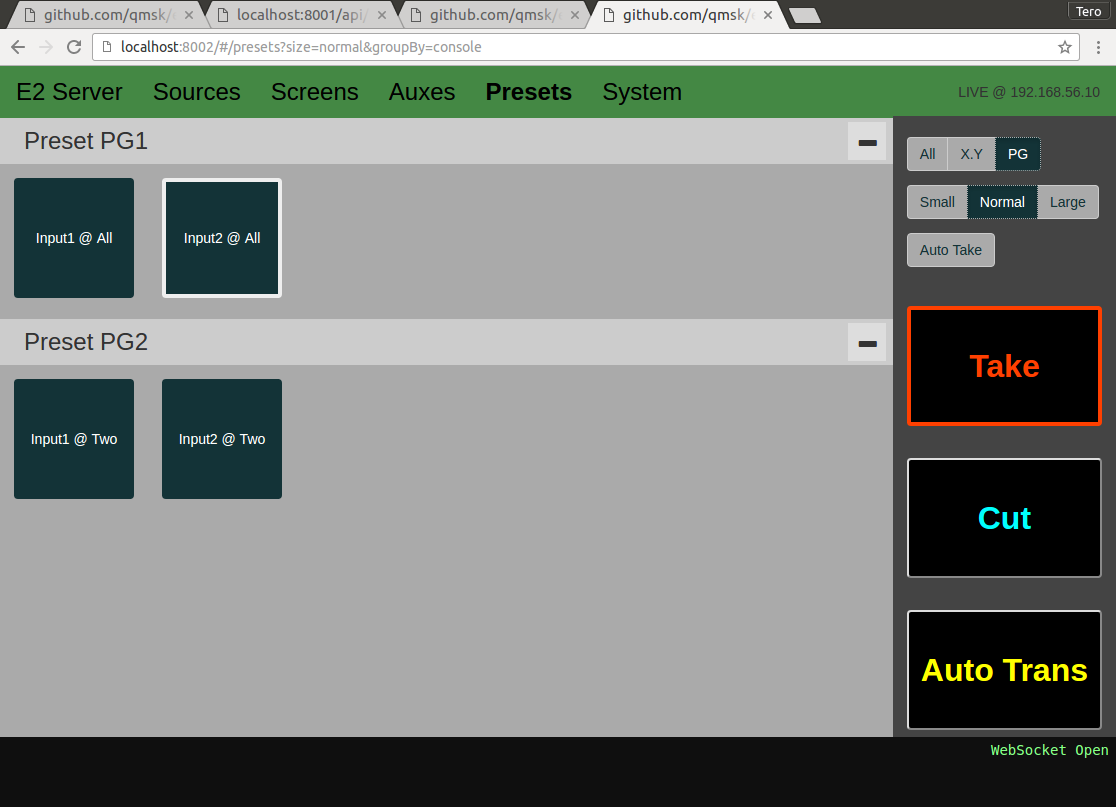
E2 Client, Tally system. Web UI with Presets.
Pre-built release packages can be found under the Releases.
Please refer to the Wiki for more detailed documentation, including development and feature guides.
You can also try submitting a GitHub Issue for support, which may or may not receive an answer.
This implementation has been tested with the following device software versions:
- E2 version 3.2
- S3 version 3.2
This implementation supports the following device APIs:
- TCP port 9876 XML (read-only, live streaming)
- TCP port 9999 JSON-RPC (read-mostly, includes preset recall)
- TCP port 9878 "telnet" (write-only, preset recalls and program cut/autotrans)
- UDP port 40961 discovery
Docker images for amd64 are available from Docker Hub: https://hub.docker.com/r/qmsk/e2/
docker pull qmsk/e2
docker run --rm --net=host --name=e2-test qmsk/e2 tally --discovery-interface=eth0 --http-listen=127.0.0.1:8001 --http-static=/opt/qmsk-e2/static
Pre-built debian packages for ARM are available from GitHub releases: https://github.com/qmsk/e2/releases
wget https://github.com/qmsk/e2/releases/download/v0.6.0-dev.5/qmsk-e2_0.6.0-dev.5_armhf.deb
sudo dpkg -i qmsk-e2_0.6.0-dev.5_armhf.deb
sudo edit /etc/default/qmsk-e2-tally
sudo systemctl restart qmsk-e2-tally
The package installs the binaries at /opt/qmsk-e2, creates a qmsk-e2 user and configures the systemd qmsk-e2-tally.service to run using /etc/default/qmsk-e2-tally for configuration.
The project consists of a set Go applications, and a Javascript web frontend. Once built, the binary Go applications + Javascript assets can be distributed and executed without needing to install the development tools and instructions listed here.
Release binaries are built using the Docker-based setup under build
Load vendored dependencies using godep:
$ git clone github.com/qmsk/e2
e2 $ dep ensure
Building the backend code requires Go version 1.10.
The Go binaries can also be cross-compiled for different platforms, such as building Linux ARM binaries on your laptop for use on a RaspberryPI:
GOOS=linux GOARCH=arm go build -o bin/linux_arm/server -v github.com/qmsk/e2/cmd/server
cd static && npm install
Building the frontend code requires:
Tally implementation for following the state of inputs on program, preview and active destinations.
Supports the following input sources:
- E2
- S3
Supports the following output drivers:
Run the tally software using a network interface connected to the same network as the E2 device:
$GOPATH/bin/tally --discovery-interface=eth0
Tag the relevant inputs in EMTS with tally=ID in their Contact details field:

Referr to the Wiki for further documentation.
Web API + frontend for following the E2 state and controlling presets.
server --discovery-interface=eth0 --http-listen=:8284 --http-static=./static
The server will connect to the first discovered E2 system.
Using the server Web UI requires the static assets for the web frontend (see Building).
Referr to the Wiki for further documentation.
go install ./cmd/client
Useful for testing the client library:
$GOPATH/bin/client --e2-address=192.168.0.100 listen
  client [OPTIONS] <command>

E2 JSON-RPC:
	  --e2-address=HOST
	  --e2-jsonrpc-port=PORT
	  --e2-xml-port=PORT
	  --e2-timeout=

Help Options:
  -h, --help                    Show this help message

Available commands:
  aux-list           List Aux destinations
  config-dump        Dump XML config
  discover           Discover available E2 systems
  list-destinations  List destinations
  listen             Listen XML packets
  preset-list        List presets
  preset-show        Show preset destinations
  screen-list        List Screen destinations
  screen-show        Show screen content
  source-list        List sources