This is a Cookiecutter template that generates Trame boilerplate.
Install the Cookiecutter package:
pip install cookiecuttercookiecutter gh:kitware/trame-cookiecutter -c v1cookiecutter gh:kitware/trame-cookiecutterThis project contains a Cookiecutter template that helps you create new Python 3.6+ package for trame by automatically generating most of the boiler plate content for you.
The cookiecutter will ask you set of questions to refine what you aim to build using trame, but the most important one which will affect the shape of what you will get is the project_type.
The project_type can be only one of the following options:
- App This will provide the infrastructure for building a trame application that can leverage all the existing set of trame components using only Python. By default a simple vtk.js application is used as reference to provide the trame basic while demonstrating an interactive application with code separation between the Python core and the web frontend. Whithin that Python package, a jupyter helper module will also be available to run and show your application within a jupyter environment. On top of that Python package, you will have access to several bundling option ranging from a standalone executable to a docker image for cloud deployment.
- App with Components This will provide the same infrastructure as above but with an additional directory that will contain a vue.js project for defining new UI elements that can then be used within your trame application. This path is more advanced than the plain Application one as it will require some Web development knowledge. Also on top of that new web structure, a Python module is getting created to bridge what has been defined on the JavaScript side so it can be used at the Python level.
- Components This is the same thing as above but without the application part. Basically it creates the Python package so it can be pip installable and used by any trame application at the Python level. But as before stated, this will require some Web development knowledge.
The structure produced by this Cookiecutter template contains the following items:
├── .*                         # (Continuous integration option) Python quality control + Github actions
├── CONTRIBUTING.rst           # Minimal content for project contribution
├── LICENSE                    # Selected license
├── MANIFEST.in                # List external files/directories that needs to be part of the Python package
├── README.rst                 # Minimal README using RST format so it get exposed to PyPI if deployed
├── bundles                    # (App option) Bundling helper for Application
│   ├── desktop                  # How to create a desktop executable
│   │   ├── macOS/*                # On macOS
│   │   └── windows/*              # On Windows
│   └── docker/*                 # How to create docker image for cloud service deployment
├── examples                   # (App option) Usage example of your application
│   └── jupyter/*                # Notebook to use inside Jupyter
├── setup.cfg                  # Configuration file for your Python package
├── setup.py                   # Python package entry point
├── tests/*                    # Testing infrastructure
├── f"{import_name}"           # Root directory for your Python package
│   ├── app                      # (App option) Root directory for your application
│   │   ├── engine.py              # Core Python code for your application
│   │   ├── jupyter.py             # Built-in adapter for usage in Jupyter
│   │   ├── main.py                # Main executable setting-up your engine+ui
│   │   └── ui.py                  # UI definition and bridge to Web frontend
│   ├── module/*                 # (Component option) web files and configuration
│   └── widgets/*                # (Component option) web to Python mapping
├── trame/*                      # (Component only option) adapter to streamline import and usage for trame
└── vue-components/*             # (Component option) Standard Vue.js project for creating a Vue plugin
- project_name [Trame App]: Human readable name for your application
- project_type [App]: Project type described in more detail above
- author: Used for your package definition (setup.cfg)
- short_description: Used for your package definition (setup.cfg)
- license [BSD]: Used for your package definition (setup.cfg + LICENSE)
- include_continuous_integration: Create Github actions with Python quality control validation (.*)
- package_name: Application name to use for
pip installor application execution - import_name: Physical name of the root directory of your application/library
Caution: If you don't keep the same options, please look at the generated README to properly capture the specificity of your setup.
$ python3 -m venv .venv
$ source ./.venv/bin/activate
$ python -m pip install --upgrade pip
$ pip install cookiecutter

$ cookiecutter gh:kitware/trame-cookiecutter

    project_name [Trame App]: Visualis
    Select project_type:
    1 - App
    2 - App with Components
    3 - Components
    Choose from 1, 2, 3 [1]:
    author [Trame Developer]: Kitware Inc.
    short_description [An example Trame application]: VTK viewer for 3d stuff
    Select license:
    1 - BSD License
    2 - MIT License
    3 - ISC License (ISCL)
    4 - Apache Software License
    5 - GNU General Public License v3 (GPLv3)
    6 - Other
    Choose from 1, 2, 3, 4, 5, 6 [1]: 4
    include_continuous_integration [y]: n
    package_name [visualis]:
    import_name [visualis]:

cd visualis
pip install . # Install your new application

pip install pywebview  # For app usage
pip install jupyterlab # For Jupyter usage
Then you can run it using your browser with the following command line:
visualis
Or show it as a desktop application with the following command line:
visualis --app
Or with Jupyter
jupyter-lab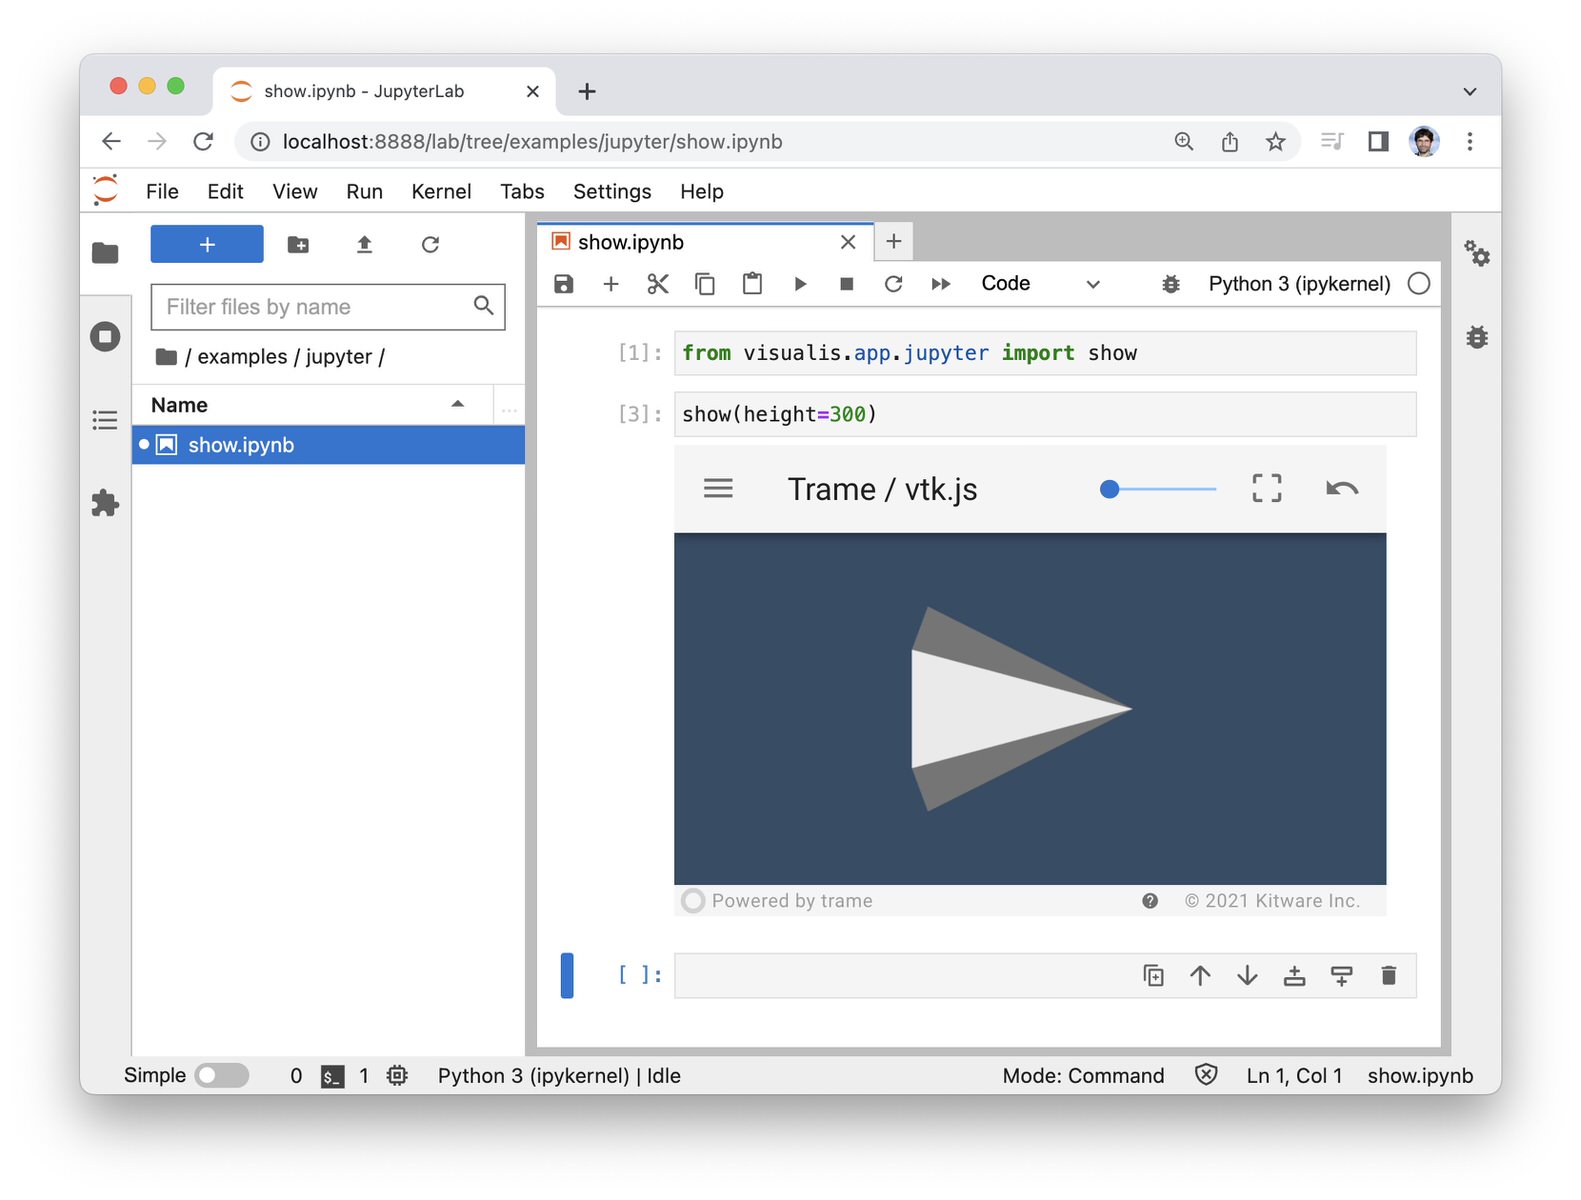
And if you have docker
cd bundles/docker
./scripts/build_image.sh
./scripts/run_image.sh
#> open http://localhost:8080/